
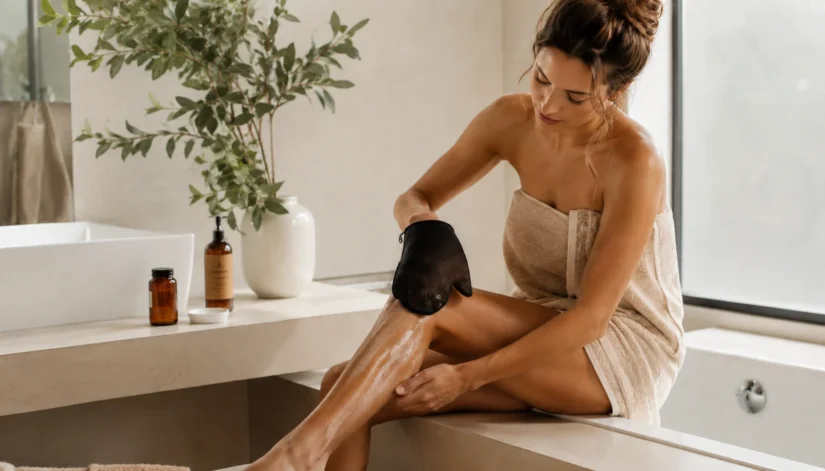
How to apply self-tanner the right way – skin prep, application technique, common mistakes, and how to get an even, streak-free glow every time.
Self-tanner sounds simple until you actually try it. You follow the instructions, wait the recommended hours, rinse off, and end up with dark knees, streaky ankles, and stained palms. Most self-tanner problems aren’t about the product – they’re about how you prep and apply it. Get the technique right and the results look natural and even.
Knowing how to apply self-tanner properly makes the difference between a natural-looking glow and an uneven result that doesn’t look quite right. Tanning with self-tanner takes a little more time than just rubbing it on, but once you learn the steps, the whole process gets easier every time.
Key Takeaways
- Exfoliate 24 hours before you apply self-tanner, not right before. Your skin needs time to settle after scrubbing, and freshly exfoliated skin absorbs self-tanner more evenly.
- Moisturize dry areas first. Elbows, knees, ankles, and wrists absorb more product than the rest of your body. A thin layer of moisturizer on these spots before application prevents dark patches.
- Use a tanning mitt, not your bare hands. A mitt distributes product evenly and keeps your palms from staining. If you don’t have one, wash your hands thoroughly after each section.
- Work in sections from the bottom up. Start at your ankles and move upward so you don’t bend over wet tanner and smudge it. Legs first, torso, arms, and face last.
- One thin layer looks better than a thick one. You can always add a second coat the next day if you want more depth.
How to Prep Your Skin Before Self-Tanner
Prep is where most people cut corners, and it’s exactly where streaks start. What you do the day before matters just as much as the application itself.
Exfoliate the night before. Use a gentle body scrub or exfoliating mitt to remove dead skin cells. Focus on rough areas like elbows, knees, ankles, and heels – these spots collect dead skin and absorb self-tanner unevenly. Don’t exfoliate right before applying because freshly scrubbed skin is too raw and will grab the product too aggressively.
Shave or wax before you exfoliate, not after. Hair removal opens pores, and applying self-tanner over open pores creates dark dots. Shave the day before, exfoliate after, and let everything settle overnight.
On application day, shower but don’t apply body lotion all over. You want clean, dry, product-free skin for the tanner to grip evenly. The one exception: lightly moisturize your dry spots (elbows, knees, ankles, wrists, hands, feet) to create a barrier that prevents these areas from drinking up too much color.
Remove any old self-tanner. If you have leftover patchy tan from a previous application, it will show through the new one. Exfoliating should take care of most of it, but stubborn spots may need an extra round of scrubbing.
Know your undertone. Not all self-tanners are the same shade. Some formulas are now split by undertone – peach tones brighten fair skin, green neutralizes redness, and violet or blue cancels orange tones. If you’ve tried self-tanner before and it looked too orange or too muddy, the shade wasn’t wrong – the undertone was.
Wait at least 10 minutes after showering. Your skin needs to be completely dry. Any moisture left on the surface will dilute the self-tanner and create uneven patches. Pat dry thoroughly and give it a few extra minutes.
How to Apply Self-Tanner: Step by Step
Once your skin is prepped, the application itself follows a simple order. The goal is thin, even layers with no rushing. If your self-tanner has a color guide (a built-in bronzer tint), it will show you exactly where you’ve applied so you don’t miss spots – helpful for beginners.
- Put on a tanning mitt. This makes the biggest difference in your results. A mitt spreads the product evenly, prevents hand staining, and gives you more control than bare hands. If you don’t have a mitt, latex gloves work too. You can also apply self-tanner without a mitt using just gloves – squeeze the product onto the glove and blend with your fingertips, washing your hands thoroughly between each section.
- Squeeze product onto the mitt, not onto your skin. A coin-sized amount per section is enough. You can always add more, but you can’t easily take away excess.
- Start at your ankles and work up. This way you don’t bend over freshly applied tanner on your legs while doing your stomach. Work in sections: lower legs, upper legs, hips, stomach, chest, back, arms, and face last.
- Use long, sweeping motions. Circular rubbing can create buildup in certain spots. Long strokes blend more evenly. Overlap slightly between sections so there are no gaps or lines.
- Use what’s left on the mitt for tricky areas. After finishing a section, the leftover product on the mitt is the perfect amount for ankles, knees, elbows, wrists, and the tops of your feet. Don’t add fresh product to these areas – they need less, not more.
- Face: mix with moisturizer. Squeeze a pump of self-tanner and a pump of facial moisturizer together, then apply to your face. This dilutes the formula slightly and prevents it from looking too intense. Blend into your hairline, jawline, and ears – these are the spots people forget.
- Hands last. Use whatever is left on the mitt to lightly sweep over the backs of your hands and fingers. Immediately wash between your fingers and under your nails – these areas stain dark and fast.
- Blend the “stop lines.” Check the backs of your heels, creases of your wrists, and behind your ears – anywhere your application naturally ends. Dab a tiny amount of moisturizer on these transitions so there’s no harsh line where tan meets bare skin.
- Wait before getting dressed. Give yourself at least 10-15 minutes to air dry before putting on clothes. Loose, dark clothing is safest while the tanner develops. Tight waistbands, bra straps, and socks will leave marks.
Common Self-Tanner Mistakes (and How to Avoid Them)
Even with good technique, a few mistakes can ruin an otherwise even tan:
Applying too much on joints. Knees, elbows, and ankles are drier and more textured. They absorb more product and turn darker than the rest of your body. The fix: moisturize these spots first and use leftover product from the mitt instead of fresh tanner.
Rushing the dry time. Getting dressed, working out, or showering too soon creates streaks, smudges, and uneven fading. Most self-tanners need 6-8 hours to develop fully. Applying before bed and rinsing in the morning is the easiest approach.
Skipping the face or doing it wrong. Your face has different skin than your body – thinner, more oily in some areas, drier in others. Applying full-strength body self-tanner to your face often looks uneven. Mix with moisturizer or use a face-specific formula. Blend into your ears, hairline, and neck so there’s no line where your face tan stops and your body starts.
Forgetting the backs of your hands. A golden body with pale white hands is one of the most noticeable signs of self-tanner. A light sweep of leftover product over the backs of your hands fixes this.
Not exfoliating beforehand. Dead skin grabs self-tanner unevenly. If you skip exfoliation, you’ll see darker patches where skin is rough and lighter patches where it’s smooth. Twenty minutes of prep saves hours of trying to fix streaks.
How to Apply Self-Tanner on Your Face
Your face deserves its own section because the technique is different from the rest of your body.
Start with clean, moisturized skin. Apply a lightweight moisturizer 10-15 minutes before the self-tanner. This creates a smooth base and prevents dry patches from absorbing too much color.
Mix self-tanner with moisturizer. A 1:1 ratio gives a subtle, natural glow. For more color, use more tanner and less moisturizer. This technique prevents the “mask face” look that happens when full-strength product hits thin facial skin.
Apply with your fingers, not a mitt. You need more precision on your face. Use small, gentle circular motions and blend outward from the center of your face. Don’t forget your temples, jawline under the chin, and ears.
Blend into your neck and chest. A tan face with a pale neck is easy to spot. Blend the product down your neck and onto the top of your chest so the color transitions smoothly.
Eyebrows and hairline. Wipe excess product from your eyebrows with a clean finger or damp cotton pad. Blend carefully along your hairline – too much product here creates a dark border that looks unnatural.
What to Do After You Apply Self-Tanner
The first few hours after application determine how your tan turns out.
Don’t shower for 6-8 hours. The DHA in self-tanner needs time to react with your skin. Rinsing too early washes away the product before it has a chance to develop fully.
Avoid sweating. Exercise, cooking over a hot stove, or anything that makes you sweat will cause the product to run and streak. Plan your application for a time when you can stay cool and relaxed.
Skip tight clothes. Elastic waistbands, socks, tight bras, and fitted jeans will leave white lines where they press against the skin. Loose, dark clothing is your friend until the first rinse.
First rinse: lukewarm water only. When it’s time to shower, use lukewarm water and no soap. The guide color (the bronzer tint that shows you where you’ve applied) will rinse away, revealing the actual tan underneath. Don’t panic if it looks lighter than expected – the color continues to develop for up to 24 hours after rinsing.
Moisturize daily. Starting the day after your first rinse, moisturize your entire body daily. Hydrated skin holds self-tanner longer and fades more evenly. Dry skin flakes off unevenly and creates patchiness.
FAQ About How to Apply Self-Tanner Without Streaks
How do I apply self-tanner without getting streaks?
Exfoliate 24 hours before, moisturize dry spots (elbows, knees, ankles), use a tanning mitt, work in sections from feet upward, and use long sweeping motions instead of circular rubbing. Less product is better – you can always add a second layer the next day.
How long should I wait before showering after self-tanner?
Most self-tanners need 6-8 hours to fully develop. Many people apply before bed and rinse in the morning. Check your specific product’s instructions – some express formulas develop faster. When you do rinse, use lukewarm water only, no soap.
What is the best way to apply self-tanner to your face?
Mix a small amount of self-tanner with your regular facial moisturizer – start with a 1:1 ratio and adjust from there. Apply with clean fingers in small circular motions, focusing on the areas the sun would naturally hit: forehead, cheekbones, nose, and chin. Blend carefully around your hairline and eyebrows with a damp cotton pad to prevent dark edges. Your ears and jawline are easy to forget but make a big difference in how natural the result looks.
Why do my knees and elbows always turn dark?
These areas are drier and more textured, so they absorb more product. Moisturize them before applying self-tanner, and don’t apply fresh product directly – use the leftover amount on your mitt instead. This gives just enough color without overdoing it.
Should I shave before or after applying self-tanner?
Shave 24 hours before applying. Shaving opens pores, and self-tanner can settle into them, creating dark dots. Giving your skin a day to recover after shaving prevents this. Never shave immediately before or after applying self-tanner.
How often should I reapply self-tanner?
Most self-tans last 5-7 days depending on your skin type and aftercare routine. You can reapply every 5-7 days to maintain your color. Exfoliate gently before each new application to remove any remaining uneven patches from the previous one.
How do I apply self-tanner to my back?
Your back is difficult to reach on your own. If someone can help you, that’s the easiest solution. If not, use a back applicator or a long-handled lotion applicator – they’re designed to reach your mid and upper back evenly. Another option is a spray self-tanner for your back only, since sprays don’t require the same blending precision as mousses or lotions.
Is self-tanner bad for your skin?
Self-tanners are considered safe for external use. The active ingredient DHA (dihydroxyacetone) reacts with dead skin cells on the surface – it doesn’t penetrate deeper layers. That said, self-tanner does not protect you from the sun. You still need SPF when you’re outside, regardless of how tan you look.
Self-tanner rewards patience. Rush the prep and you’ll spend twice as long fixing streaks. Take 20 extra minutes to exfoliate, moisturize your dry spots, and apply in thin layers with a mitt, and the result looks like you just came back from a week at the beach – which is exactly the point.
More Articles About Skincare
- After Sun Skincare: How to Recover Your Skin After a Day in the Sun
- Summer Skincare Routine
- Sweat-Proof Makeup: How to Make Your Look Last All Summer
Disclaimer: This article is for informational purposes only.
Written by Pure as Beauty